Signing Webpages with GnuPG

Inspired by this old post from Rob Smith I have started making some changes to the blog. All of the pages are now signed using my GPG key, and can be verified by running curl https://www.brianlane.com/ | gpg --verify on the page.

Rob did this by adding a plugin to Jekyll, but I’m using the Pelican static blog system for these pages, and as far as I can tell Pelican’s plugin support has no way to make sure your plugin is the final one being executed. It ends up being simpler to just run a bash script on all of the html pages using find ./output/ -name '*.html' -exec ./sign_page {} \;

Transitioning to a New GPG Key

I am transitioning to a new GnuPG key, here is my transition statement, based on one from Simon Josefsson

Here is my signed statement:

- -----BEGIN PGP SIGNED MESSAGE-----
Hash: SHA512,SHA1

OpenPGP Key Transition Statement for Brian C. Lane

I have created a new OpenPGP key and will be transitioning away from
my old key.  The old key has not been compromised and will continue to
be valid for 30 days, but I prefer all future correspondence to be
encrypted to the new key, and will be making signatures with the new
key going forward.

I would like this new key to be re-integrated into the web of trust.
This message is signed by both keys to certify the transition.  My new
and old keys are signed by each other.  If you have signed my old key,
I would appreciate signatures on my new key as well, provided that
your signing policy permits that without re-authenticating me.

The old key, which I am transitioning away from, is:

pub   1024D/0x21FB63FE9712C2CD 1998-11-13 [expires: 2015-06-23]
      Key fingerprint = 799F A3B6 AEF8 E9B4 D720  56D0 21FB 63FE 9712 C2CD

The new key, to which I am transitioning, is:

pub   4096R/0xD29845A70F5017DE 2015-05-23 [expires: 2016-05-22]
      Key fingerprint = 33C6 86A0 96DC 1247 77D9  9326 D298 45A7 0F50 17DE

The entire key may be downloaded from: https://www.brianlane.com/0xD29845A70F5017DE.txt

To fetch the full new key from a public key server using GnuPG, run:

  gpg --recv-key 0xD29845A70F5017DE

If you already know my old key, you can now verify that the new key is
signed by the old one:

  gpg --check-sigs 0xD29845A70F5017DE

If you are satisfied that you've got the right key, and the User IDs
match what you expect, I would appreciate it if you would sign my key:

  gpg --sign-key 0xD29845A70F5017DE

You can upload your signatures to a public keyserver directly:

  gpg --send-key 0xD29845A70F5017DE

Or email bcl@brianlane.com (possibly encrypted) the output from:

  gpg --armor --export 0xD29845A70F5017DE

If you'd like any further verification or have any questions about the
transition please contact me directly.

To verify the integrity of this statement:

  wget -q -O- https://www.brianlane.com/key-transition-2015-05-23.txt|gpg --verify

- -----BEGIN PGP SIGNATURE-----

iQIcBAEBCgAGBQJVYR8NAAoJEEp9FH6lgDqCRrUP/1A1vj8Z+2BESx/ErBTcQr5/
rTdRnUcQN24mGMEP/+gsDr7EasfsILUafbbE4080RNgmyOp9rnGUjZopnsu0fQQW
zMNb8l+ufA7ySSojViJjWHSflzT1bv5jbLXoYw5wZKTT2b2LEXpyaw9Bz8W2mPPx
97P2hh+Ynygw7y29hX9OCCmeKxQPAhubf58dy/FSDu0ZJhzjgYjzLkhAIHWYmRcO
smRz+3yeii+XiDSSqscxyqf5r2oRA9LmI0JHTQaegHfizGUj6AY3aNLD4Xq7IoS1
NdInS83xNq2E1d4lAiCtM9isg+vJccROpn86Rh3/28iuNtlj6Vd0YLFVpaAx8NZU
XJ778++19YX9cQbCTXszPNGAPDiiZl7uNOdy/dRmJPuPgD41zTbYi8khUOF0PKxT
H4NgRA2nxKhsxSfviPCeDebiKYA4pUpENzy+66/oPvEwmcAnB2z7S9rlMxtk3dmu
1jsgHMejPkM0RkPLHnaa7EX3u8FwpeWX99xJG2J1ltTTTRbPLVUdp0stiECQa0FZ
fYNlWR/SJ4qoSFp61hyxfljYY+7t2kLRz+hjqeR1s5oKWEkBHOy1e58q9y/oU+Ee
LnS0N1sINsEUM5Wpl8fhxnMJEsX6+F24rW9bOWAVB8GB7YO6CIEORaJff2F7q9j+
Pt9bx9aiVx4EvBz7ky1/iEYEARECAAYFAlVhHw0ACgkQIftj/pcSws3WMgCdHHBm
L9hMnZla3NIr3dC8B7AVji0An3SQWZ9bYmhXIFDpQ1dreE3+srJG
=9lQN
- -----END PGP SIGNATURE-----
Creating OpenStack images with livemedia-creator

I was going to write about using mock to make live iso's without using virt-install, but this week is the OpenStack Summit and one of the things you can use livemedia-creator (lmc) for is making disk images for use with OpenStack.

If you followed the instructions in my previous post on creating live isos you already have everything you need except the kickstart and OpenStack. I'm not going to cover how to setup OpenStack, I used the instructions from the RDO project Quickstart without too much trouble.

Creating live isos with livemedia-creator

In this post I am going to describe how to create bootable live isos using livemedia-creator (lmc). It was created so that the same Anaconda installer logic would be used for installing systems and creating bootable media like the live iso. lmc can also be used to create disk images, but I'll cover that in the next post. Anaconda and kickstart are used to install the packages, and lmc compresses the filesystem and wraps it up in an iso. This is different from the livecd-creator tool, which is a separate project that duplicates some of Anaconda's behavior and includes its own iso creation code instead of depending on Lorax.

Creating the Anaconda boot.iso with lorax

Fedora 22 is almost here, so I thought I'd write a couple posts on how to use lorax and livemedia-creator to create bootable Fedora images. I'll start with lorax. It is used to create the Anaconda boot.iso which is used to install systems using a network connection. You can also automate your installations by using the boot.iso with a kickstart file. Lorax is part of the current release-engineering workflow and is used to create the boot.iso/netinst Anaconda installer image. Pungi also uses the results from lorax when creating the DVD including package repositories.

Saving the state for Home Media Server

Saving the state for Home Media Server

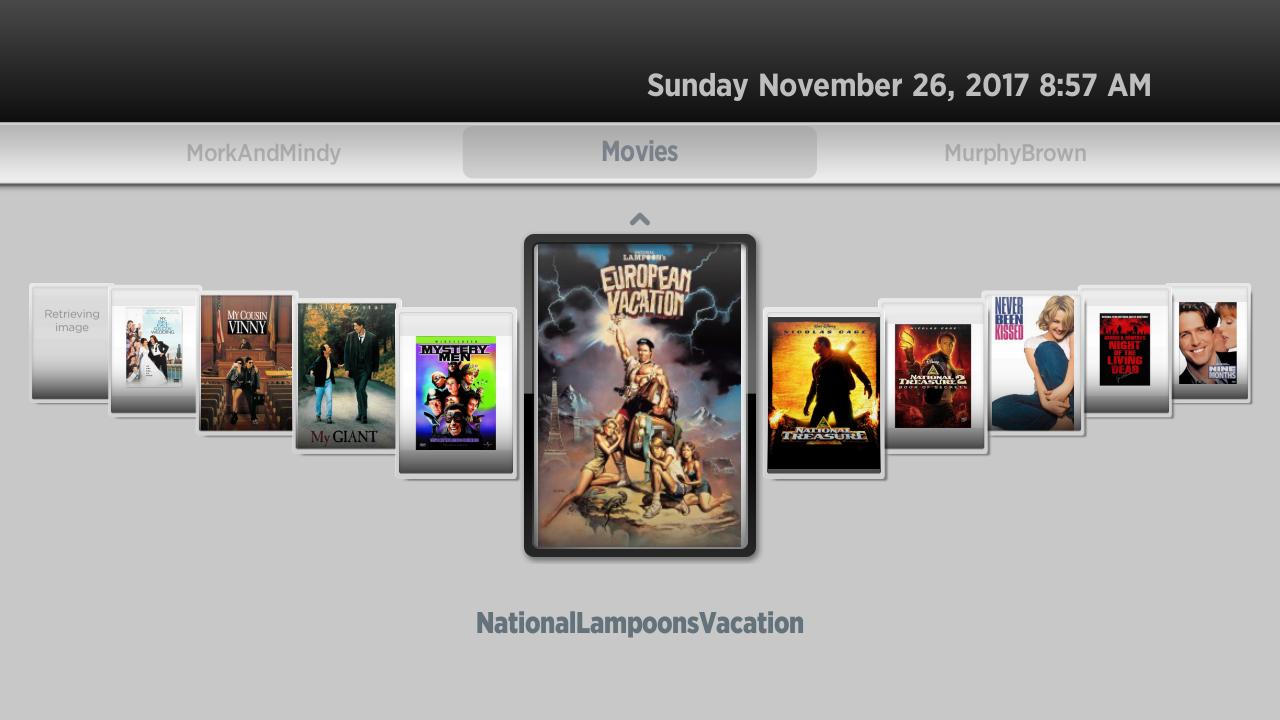
Home Media Server is a Roku application for streaming video from a http server. I started the project in 2009 after Roku released the SDK for their devices . Originally it was a server and a client, but I rewrote it in 2010 as just a client so that the only external dependency was a http server that could handle partial file requests.

In 2013 I rewrote the client to use the gridScreen layout which lets you display more content at the same time and makes it easier to split things into categories. Currently it only supports video streaming, I never have gotten around to adding audio support or photo albums like I had originally planned.

Setup oath ssh login on Fedora

Setup oath ssh login on Fedora

There are occasions where I’d like to be able to ssh to a system without using the password or having to setup a ssh key. Another alternative for authentication is the pam_oath module which allows you to use OATH applications like FreeOTP or Google Authenticator for 2-factor logins.

Start by installing the required packages. This is specific to Fedora, other distributions will be similar but slightly different in fun and challenging ways.

yum install pam_oath oathtool gen-oath-safe

Setup the sshd pam configuration to use pam_oath by adding this to the first line of /etc/pam.d/sshd