Fedora

PXE booting with QEMU and UEFI

This is a followup to the qemu with PXE boot post I wrote a few years back. In this post I will cover the creation of a live filesystem using livemedia-creator, and PXE booting it with qemu and UEFI. I am assuming that you have some familiarity with using Anaconda to install Fedora, CentOS, and Red Hat Enterprise Linux. As well as with my previous posts about livemedia-creator . Building the image with livemedia-creator The creation process is similar to creating live isos but instead of an iso we will create the live root filesystem.

Setting up PXE boot with qemu

I was expecting to spend the whole afternoon getting a tftp server setup so I could PXE boot some qemu virtual machines for testing. I wanted to make sure it didn’t interfere with anything else on the LAN so it would have to be limited to the user mode network I use with my vms. Typically when I try to do something like this I end up trying a bunch of different things that don’t quite work right.

Creating OpenStack images with livemedia-creator

I was going to write about using mock to make live iso's without using virt-install, but this week is the OpenStack Summit and one of the things you can use livemedia-creator (lmc) for is making disk images for use with OpenStack. If you followed the instructions in my previous post on creating live isos you already have everything you need except the kickstart and OpenStack. I'm not going to cover how to setup OpenStack, I used the instructions from the RDO project Quickstart without too much trouble.

Creating live isos with livemedia-creator

In this post I am going to describe how to create bootable live isos using livemedia-creator (lmc). It was created so that the same Anaconda installer logic would be used for installing systems and creating bootable media like the live iso. lmc can also be used to create disk images, but I'll cover that in the next post. Anaconda and kickstart are used to install the packages, and lmc compresses the filesystem and wraps it up in an iso.

Creating the Anaconda boot.iso with lorax

Fedora 22 is almost here, so I thought I'd write a couple posts on how to use lorax and livemedia-creator to create bootable Fedora images. I'll start with lorax. It is used to create the Anaconda boot.iso which is used to install systems using a network connection. You can also automate your installations by using the boot.iso with a kickstart file. Lorax is part of the current release-engineering workflow and is used to create the boot.
Setup oath ssh login on Fedora

Setup oath ssh login on Fedora

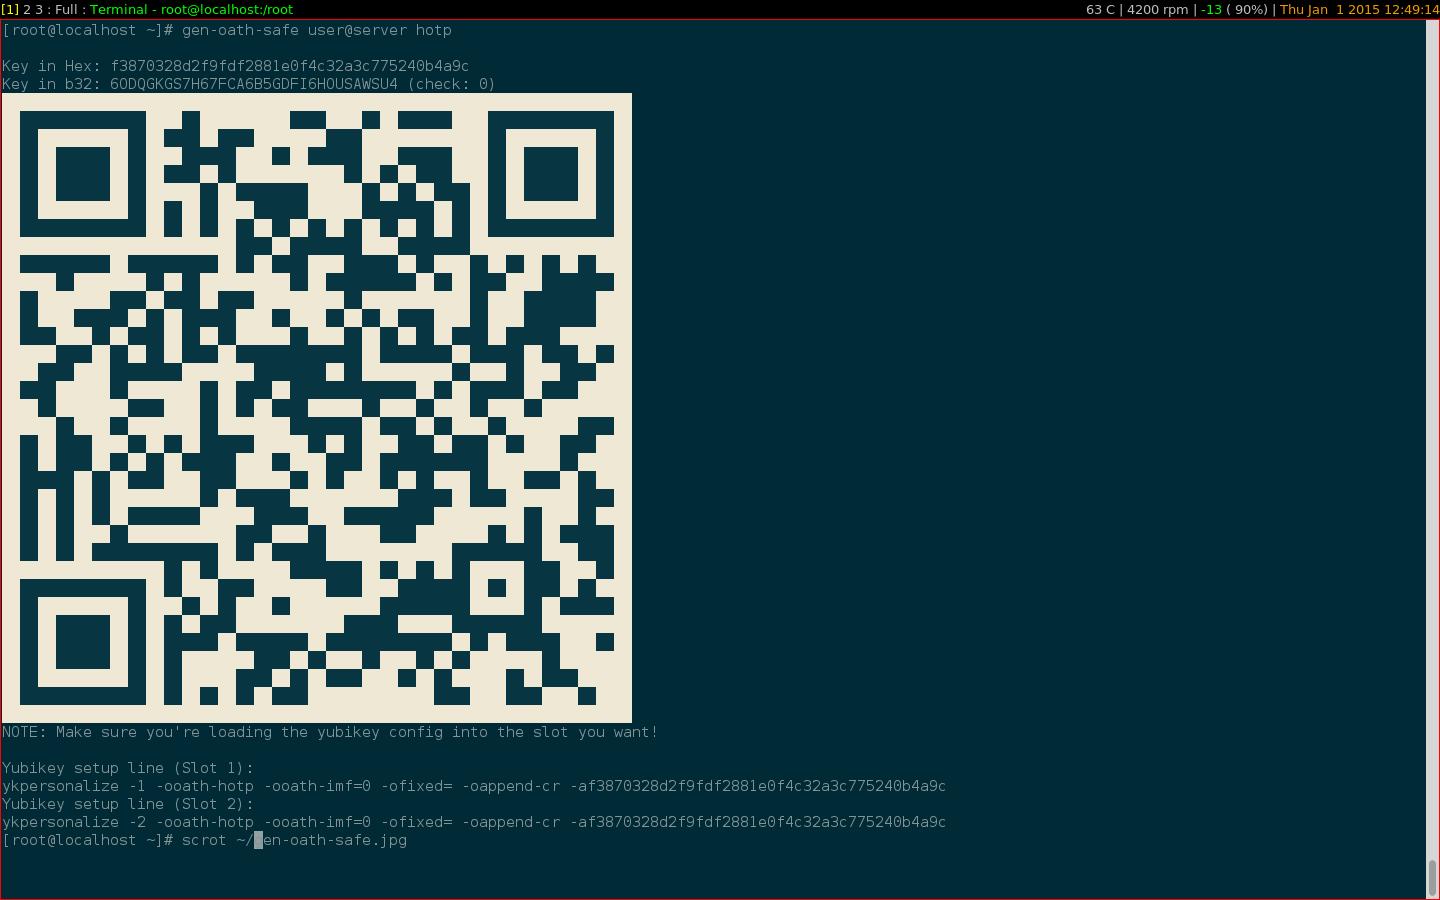
There are occasions where I’d like to be able to ssh to a system without using the password or having to setup a ssh key. Another alternative for authentication is the pam_oath module which allows you to use OATH applications like FreeOTP or Google Authenticator for 2-factor logins. Start by installing the required packages. This is specific to Fedora, other distributions will be similar but slightly different in fun and challenging ways.

Xmonad on a MacBook Pro with Fedora 19

For years I have dual booted my Macbook with Fedora. Things have always almost worked, but never quite as smoothly as they do under OSX. Typically the problems are with the trackpad, wireless drivers and heat control – The fans on my MBP didn’t want to kick on at the point I’d like them to and Fedora just runs hotter than OSX does for the same workflow. With F19 things are somewhat better, the following xorg config file dropped into /etc/X11/xorg.

Nice %changelog entries

When updating a rpm package it is nice to include a summary of the changes made since the last time. anaconda does this with a nifty script written by dcantrell called makebumpver which also enforces some RHEL rules and handles changing the version. I only needed the changelog part of this so I modified the script a bit to remove the extras: #!/usr/bin/python # # git-changelog - Output a rpm changelog # # Copyright (C) 2009-2010 Red Hat, Inc.

AIS feed is up again

A few weeks back my ancient Compaq laptop stopped booting (two LOUD beeps, no display, no drive noises). This system has been used in the garage to act as a serial to WiFi bridge for my AIS receiver, and to log temperatures for the garage and freezer temps you see at digitemp.com. The AIS data feeds the Live AIS view of Puget Sound. The laptop was exiled to the garage after its power connector broke for the 3rd time and I had to hard-wire it by soldering it directly to the motherboard.

Using RAID to Escape Disaster

Failed hard drives are inevitable. Especially when the drive in question was manufactured on November 27, 2001. You know the time has come to replace it when your log files start filling up with errors like this: Oct 28 03:53:05 cat kernel: res 51/40:00:fc:33:4e/00:00:00:00:00/e0 Emask 0x9 (media error) Oct 29 16:06:46 cat smartd[24427]: Device: /dev/sdb [SAT], FAILED SMART self-check. BACK UP DATA NOW! Failure is inescapable. Everything fails eventually, computers, people, electronics.